N Scale North American Passenger Cars |
HomeProduct Maintenance |
Corrugated Passenger Cars |
| Picture (Click to Zoom) | Directions |
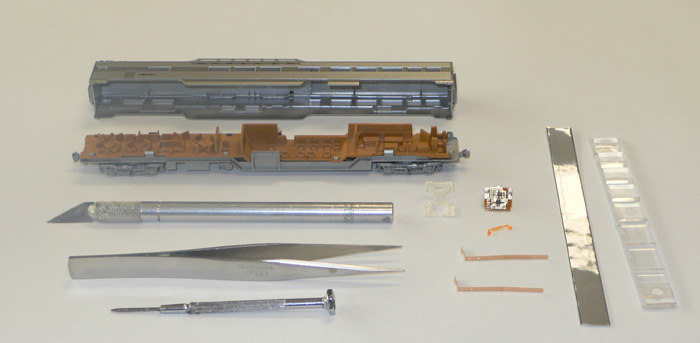 |
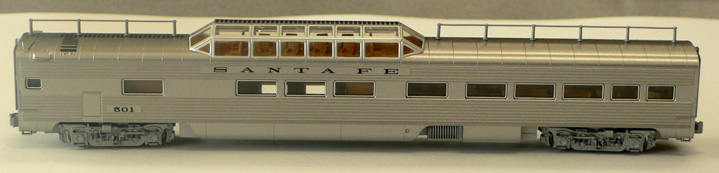
Step 1: Preparation and tools For the installation, you will need (obviously) a dome passenger car (in this case one from the Santa Fe Super Chief) and an interior lighting kit with white LED (11-209 or 11-210). An exacto knife or other similar modeling tool is recommended for marking off and making cuts in the foil strip in the kit, while tweezers are useful in setting the strip in the right place. |
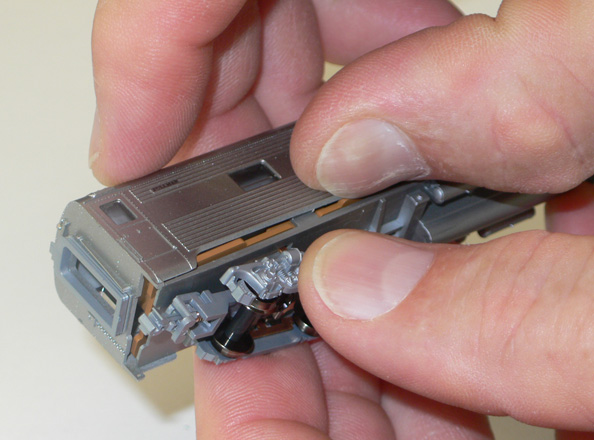 |
Step 2: Removing the body shell The dome car's body shell is easily removed by grasping one of the trucks in your thumb and forefinger, and gently inserting a fingernail between the base of the car and the body and popping it up. Make Sure to keep track of the orientation of the body shell versus the base as it will make life easier when it comes time to reassemble the car. |
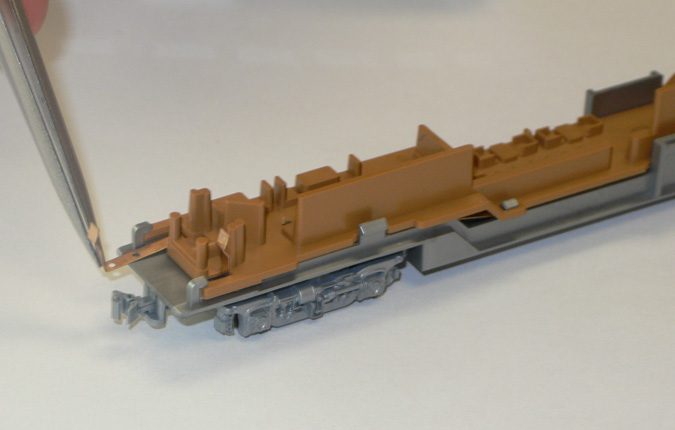 |
Step 3: Inserting the contact leads The leads will only fit into place on one side of the car, and should be inserted as shown here. When correctly placed they should slide the full length of the groove in the interior detail plate. |
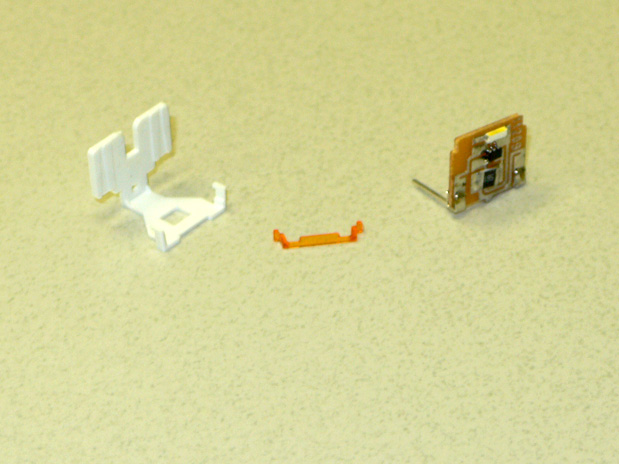 |
Step 4: Assembling the LED fixture part 1 You will need to assemble the light fixture before you can set it in place. The light fixture in the 11-209 and 11-210 kits consists of three pieces: the mount, the LED board, and the optional orange filter. The orange filter may be utilized to give the interior lights a "warmer" and more subdued color or it can be left off to give the lights a brighter and more flourescent appearance. |
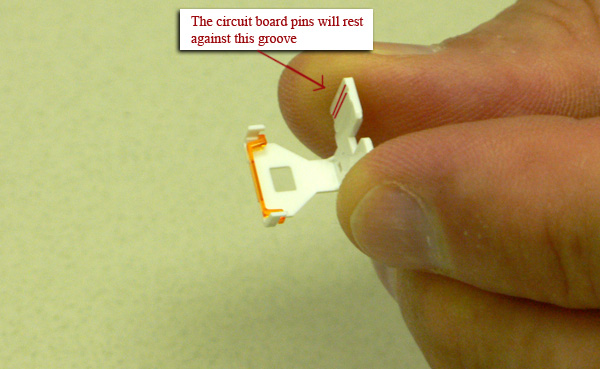 |
Step 5: Assembling the LED fixture part 2 If you are installing the orange filter, do so by installing it into the mount as shown here. Once this has been done, the LED circuit board will lock into place with its flat side facing away from the plastic, and its two metal pin connectors sliding into the little grooves in the white plastic mount. Finally, Cut a small square from the foil sticker provided with the kit that is the size of the board and attach it to the exposed, brown, flat side of the LED board. |
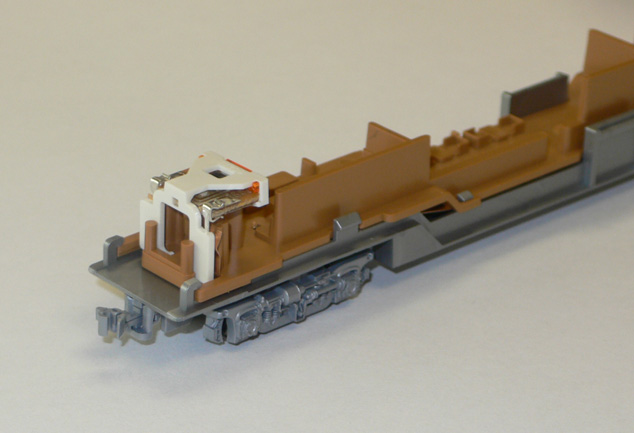 |
Step 6: Placing the LED fixture The newly assembled LED fixture will set into place on the car's base as shown. Note the contact leads sandwich between the fixture and the car's base. |
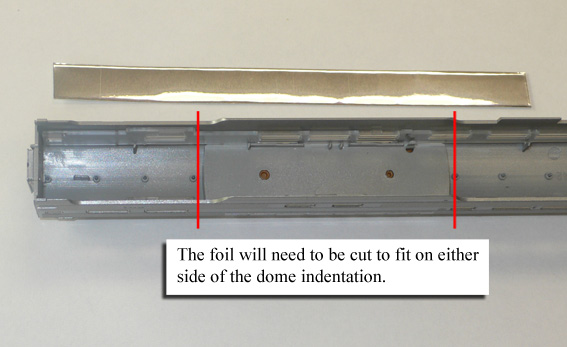 |
Step 7: Trimming and placing the foil strip If you wish to illuminate the dome as well as the rest of the car, you will need to trim the foil strip into two pieces that will fit into the space on either side of the Dome indentation. You can, if you wish, simply run the strip uncut across the roof of the car but then you will not get any light diffusion into the upper dome area. Measuring and placing the foil strips can be made simpler if you remove the windows from the car beforehand. |
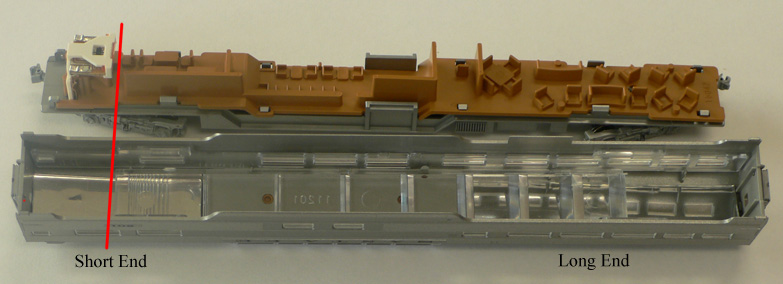 |
Step 8: Setting the light tube The light tube will sit with the ribbed side pressed against the roof of the bodyshell and should be placed accordingly so that the front end of the LED mount is placed against the squared, ridged end of the light tube. The ridged side of the light tube should be placed on the shorter end of the dome roof. |
 |
Step 9: Finishing up Replace the body shell, taking care to put any window parts back into place and making sure that the body shell is oriented correctly on the body. If it bows out at the sides when placed, it is on backwards and will need to be flipped around (and possibly the light tube position changed accordingly). The dome of the car will light up very subtly and only be visible in very low light conditions, much like the real car. Minimal floor lighting was necessary to allow passengers to see out of the windows during the night, providing just enough illumination for them to walk without danger of tripping. |