N Scale North American Passenger Cars |
HomeProduct Maintenance |
Southern Pacific "Morning Daylight" Passenger Cars |
| Picture (Click to Zoom) | Directions |
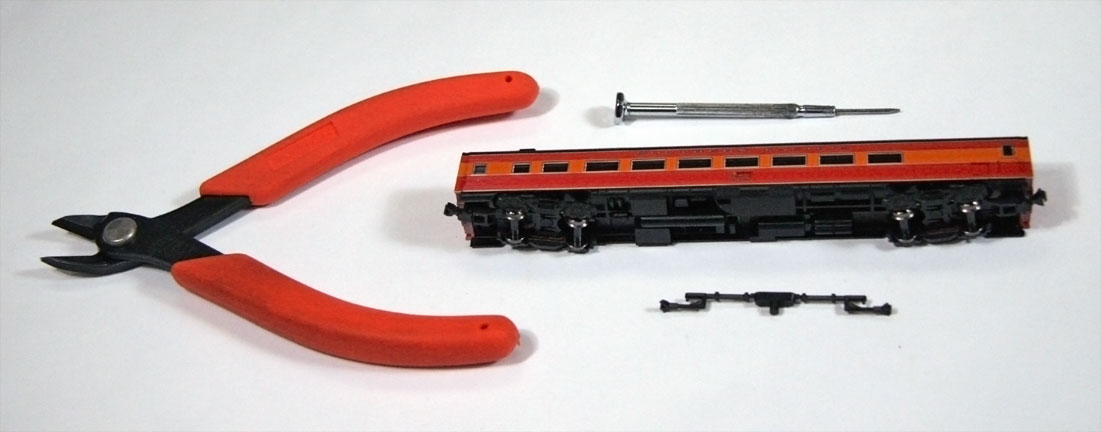 |
Step 1: Tools and Preparation To install the optional kinematic coupler sets, you will need a small flat-head screwdriver and a pair of sprue cutters or clippers to remove the couplers from their trees. |
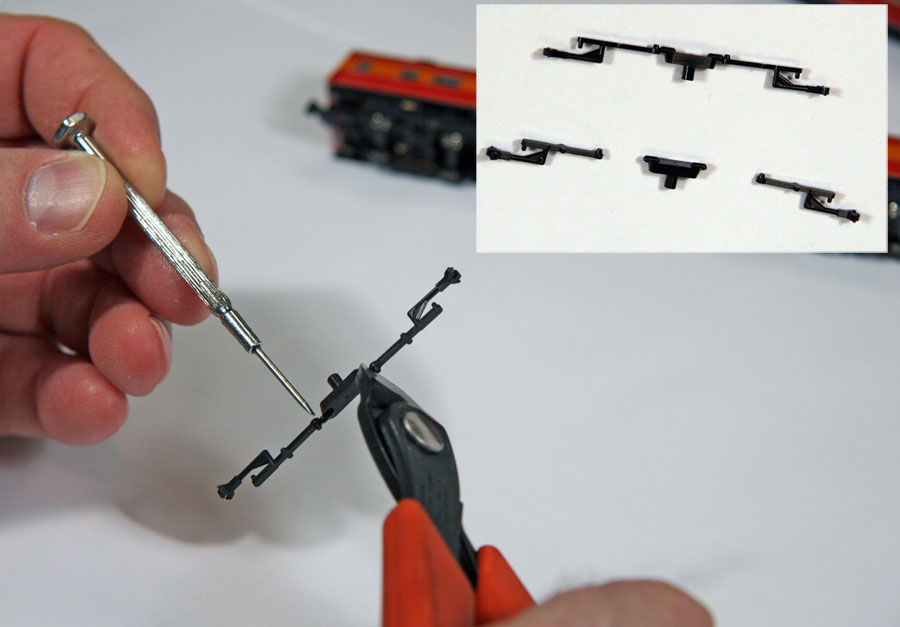 |
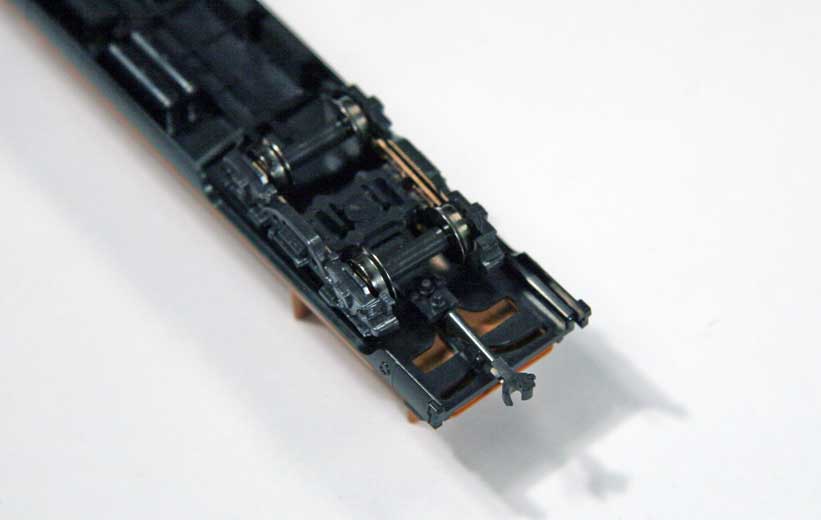
Step 2: Preparing the Kinematic Couplers Carefully clip the couplers from the trees at their bases. See the inset photo to see where the couplers should be clipped. |
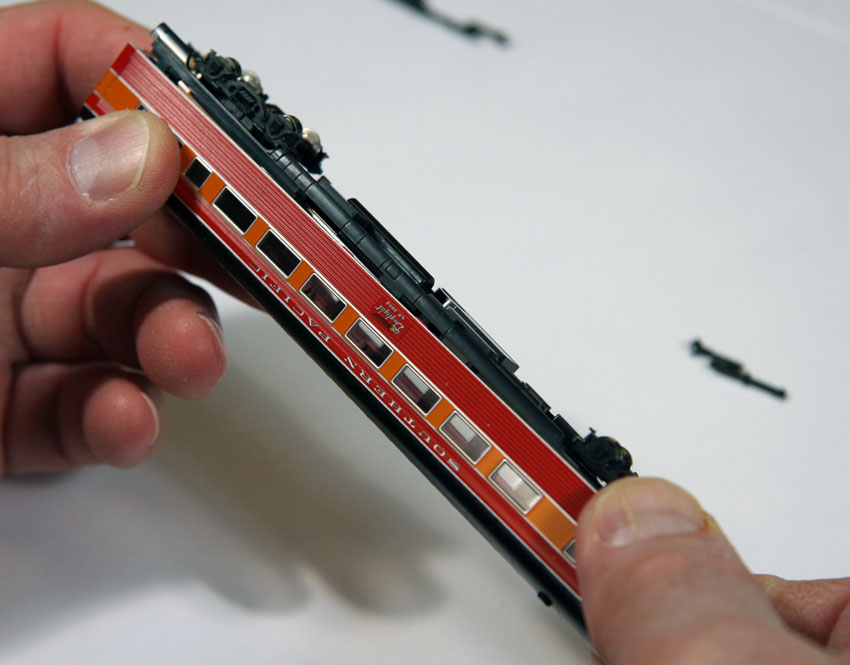 |
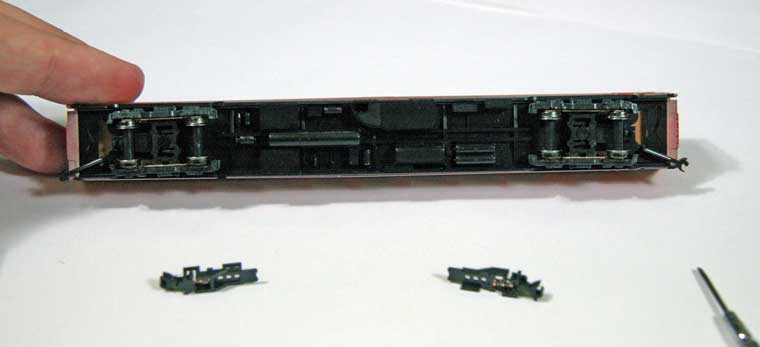
Step 3: Loosening/Removing the bodyshell The kinematic couplers cannot be installed or removed while the car's bodyshell is locked into place. To loosen or remove it, grasp the car on either end and twist it gently back and forth until the skirting and underbody pops free of the upper shell. You will need to loosen the bodyshell on each side of the car you wish to install the coupler on (in the case of articulated cars) or remove it entirely for ease of installation (on the individual cars). |
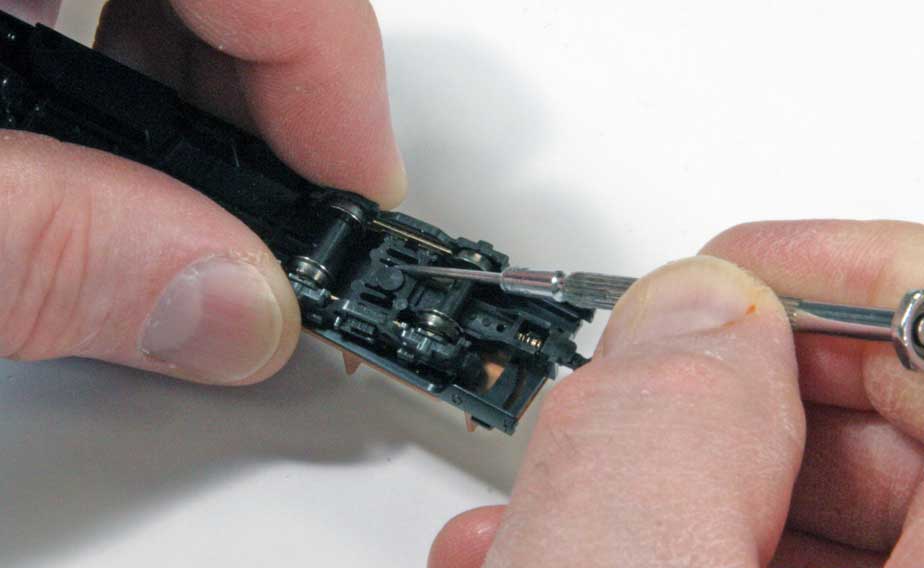 |
Step 4: Removing the trucks You will need to remove the trucks to remove the existing knuckle coupler. The trucks are a snap fit; to remove them, slip the blade of your screwdriver between the tabs and gently pry them open while pulling up on the truck. The truck will pull free when you release both tabs. Do this on both sides of the car you wish to install couplers on. |
 |
Step 5: Removing the knuckle coupler and bracket The coupler bracket is held onto the trucks by a similar pair of tabs; use your screwdriver to gently pry the sides out and pull it free. This will free the truck for the installation of the body mounted kinematic coupler. |
 |
Step 6: Installing the Kinematic coupler With the body shell freed from lower section of the car, you can freely install the kinematic coupler. From the underside, slide the coupler in, as shown, and position it so that the "guide pin" is in the "V" shaped guide slot. Do this on both sides of the car you wish to install couplers on. |
 |
Step 7: Re-install the Trucks Re-snap the trucks into place with the mounting pins oriented as shown. Re-install the trucks on both sides of the car. |
 |
Step 8: Replace the bodyshell If the bodyshell was removed, put it back in place, being sure that all the tabs line up and the shell fits snugly without any bulging. |
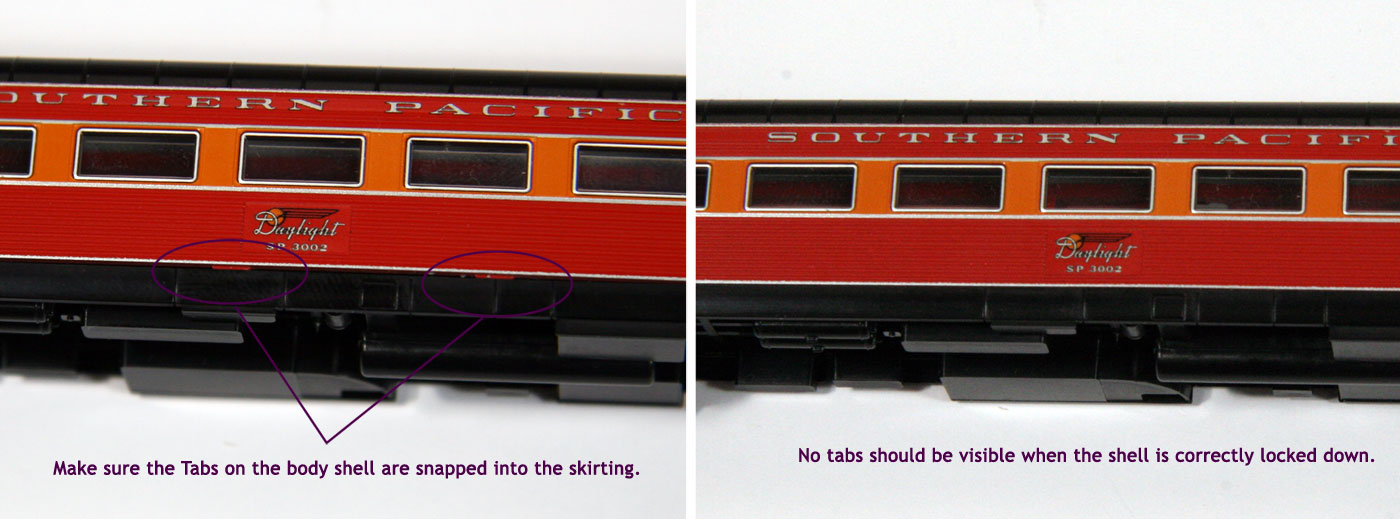 |
Finishing Touches: Keeping everything secure The skirting locks into the bodyshell with small tabs; they may not have locked in all the way when the shell was replaced. Simply squeeze and massage the shells to re-lock them into place. |